Israel Tycoon Dropper & Upgrade Tiers
S–D priorities for early, mid, and late game cash efficiency.
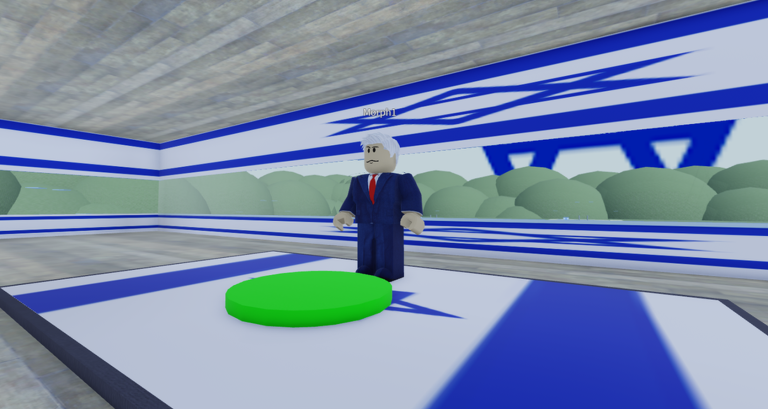
This Tier List Hub ranks what to buy first in Israel Tycoon so your cash compounds instead of stalling on cosmetic walls. The game loop is straightforward—claim a plot, purchase droppers, connect conveyor belts, expand floors and walls, then push toward the Millionaire ($1M) and Billionaire ($1B) badges—but purchase order still decides how fast you get there.
Tiers below are priority tiers, not rarity cosmetics. An S-tier choice is something you should buy as soon as it is affordable and your belts can support it. D-tier options can wait until income is comfortable.
How we rank
| Factor | Why it matters |
|---|---|
| Cash per second impact | Directly shortens badge timers |
| Synergy with conveyors | Droppers without belts waste items |
| Unlock timing | Early power spikes beat late vanity |
| Opportunity cost | Money spent here is money not spent on floors |
| AFK friendliness | Stable lines beat bursty manual pickup |
Revisit this list after major patches; dropper prices and outputs can shift when the place updates.
Early game tier list (first plot hour)
Goal: turn a bare pad into a short, reliable production line. Redeem codes first if you still have them—especially 60KVISITS! and THANKYOU—then buy in this spirit:
| Tier | Priority buys | Why |
|---|---|---|
| S | Starter droppers, first collector path, essential conveyor segments | Creates income from nothing |
| A | Second / third dropper before fancy walls | Multiplies belt throughput |
| B | Basic wall segments that unlock adjacent buttons | Opens space without overspending |
| C | Decorative or low-impact pads | Delay until belts are stable |
| D | Expensive vanity with no income link | Ignore on day one |
Early mistakes to avoid: buying every wall button in sight while you still own a single dropper, or placing droppers with no conveyor route to a collector. Read getting started alongside this table.
Mid game tier list (stable income → Millionaire)
Once a few droppers are humming, mid game is about density and routing. You are aiming at the Millionaire badge without painting yourself into a jammed floor plan.
| Tier | Priority buys | Why |
|---|---|---|
| S | Higher-output droppers, belt merges that prevent pile-ups | Biggest CPS jumps |
| A | Floor expansions that unlock new dropper rows | More pads for more machines |
| A | Redundant conveyor lanes around chokepoints | Keeps AFK income alive |
| B | Defensive / perimeter walls after income is healthy | Space control, secondary |
| C | Situational buttons with unclear payout | Buy only with surplus |
| D | Impulse buys right before a better dropper unlock | Hold cash instead |
Mid game tip: after redeeming 500LIKES! ($1,000,000), do not dump the entire balance into walls. Split toward dropper upgrades and the floor pieces that unlock them. The earn money fast guide covers spend sequencing in more detail.
Late game tier list (Millionaire → Billionaire)
Late game is a throughput war. Billionaire ($1B) demands sustained production, smart expansion, and opportunistic air drops while you AFK.
| Tier | Priority buys | Why |
|---|---|---|
| S | Top dropper tiers still missing on your plot | Scales total output |
| S | Full conveyor coverage on every new floor | No orphan droppers |
| A | Multi-floor expansion when ground level is saturated | Vertical growth |
| A | Quality-of-life pathing so you can rejoin and fix jams fast | Protects long sessions |
| B | Remaining wall kits for completionism | Fine after CPS is maxed |
| C–D | Anything that does not raise income or unlock income | Trophy spending only |
If offline-style earnings are active in the current patch branding, late-game investment into robust belts still matters: you want the plot productive whether you are watching or not.
Droppers vs conveyors vs floors
Think in systems, not isolated buttons:
- Droppers create value.
- Conveyors deliver value.
- Floors / walls unlock more of (1) and (2).
An S-tier dropper behind a D-tier belt plan becomes average. Always budget a conveyor slice whenever you add machines. The expand your base guide shows how to grow pads without choking lanes.
Sample buy order (compressed)
- Redeem available codes.
- Buy the cheapest functional dropper + path to collector.
- Add conveyors until items stop falling into the void.
- Add the next dropper before decorative walls.
- Expand the floor when buttons for better droppers appear behind paid tiles.
- Reinvest surplus into higher tiers and jam-proof belts.
- Sprinkle air-drop pickups into every session for bonus spikes and Lucky! odds.
Using this list with badges
- Welcome — join and begin; no purchase order required.
- Meet The Owner — social / presence goal; keep grinding while you watch for the owner.
- Millionaire — mid-game S/A priorities above.
- Billionaire — late-game throughput focus.
- Lucky! — air-drop RNG; tiers do not buy this directly, but longer healthy AFK sessions mean more crate chances.
Related guides
- Getting started — day-one execution
- Earn money fast — CPS tactics
- Expand your base — floors, walls, belts
- Air drops — crate value and Lucky!
- Codes Hub — free cash injections
Treat this hub as your purchase compass. When two buttons cost similar cash, prefer the one that raises dropper count, belt reliability, or floor access to better machines—and leave vanity for after Billionaire.
Frequently Asked Questions
Quick answers about codes, droppers, badges, and progress in Israel Tycoon.
What should I buy first in Israel Tycoon?
Prioritize starter droppers and the conveyors that feed your collector before spending heavily on decorative walls.
Are walls ever S tier?
Only when a wall or floor tile is the gate that unlocks a clearly better dropper row. Otherwise keep walls in B–D early on.
Should I spend the 500LIKES! code on expansion?
Split it. Fund high-impact droppers and the floor pieces that enable them; do not blow the full million on low-value walls.
Does this tier list change after updates?
Yes. Re-check priorities after major patches because dropper costs and outputs can shift.
How do tiers relate to the Billionaire badge?
Late-game S-tier choices maximize sustained cash so you can reach the $1B Billionaire badge faster.